10.09.2009

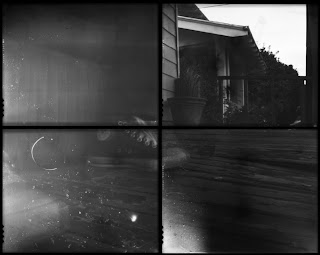
lately i've been really into self portraits. most of the inspiration for doing this is from "holgajen". obviously she puts a lot more thought into how she does it, but hey, you gotta start somewhere, right? anyway, here's a couple recent self portraits i shot with a homemade round pinhole camera i like to call "the bomb", well because it looks like a bomb. black electrical tape can sometimes be a bad thing i guess.

"with geese"


"with fish"

8.19.2009

i've been doing so many projects lately that i haven't been finishing any of them before i start a new one. most of the projects seem to do with death and creepiness and putting myself in stressful situations. so i decided to take it easy with a project i'm calling "vs the water". the images are just shots of bodies of water that have man made objects "fighting" the water. below are a few of my first ones, all shot on the willamette river in and around portland, or. the camera is a homemade curved back 4x10 camera. i really hope i actually continue with this project, it's been really fun and a nice change of pace.


speaking of "change of pace", for all of you in a artistic freeze this article may help. some times it's nice to do something you would normally never do. chase jarvis - 9 things to do when you're feeling stale.

8.10.2009

one more

this last weekend i decided to have a pinhole self portrait day. my last post was from that day and here is the last shot. this was done with the filing box camera i made. i never spray painted the inside so the negs are super dark, but my epson found some information on the film and photoshop did the rest for me. anyway, i need to fix the problem with my camera really bad.

exposure was 3 minutes.

8.09.2009

couple self portraits

i should in bed. but instead, here are a couple self portraits i did. i have one more i need to scan, but it's 4-4x5 negs and i don't want to scan them right now. both images are made with cameras i built 5, maybe 6 years ago. i'm glad i used them because i refell in love with them and will start using them a lot more.

this one was shot with a converted kodak t-max100 4x5 50 count box. exposure time was 1.5 minutes.


this second one was shot with a round camera made out of something that escapes me now. it looks a little like a bomb, so i just call it my round bomb. exposure time was 1.5 minutes.

8.03.2009

first shot from filing box camera.

here it is! the first shot from the filing box that i turned into a pinhole camera. they turned out super dark, i think the plastic isn't as opaque as i originally thought. that problem is easily fixed with a bit of flat black spray paint. so this image is pretty photoshop, which i don't mind but i feel better about my shooting skills when i don't need to photoshop so much. all-in-all i really like the final image. hopefully i can shoot with it more during the weekend. so more to come!

8.02.2009

filing box pinhole camera

i've wanted to build a pinhole camera out of an object that was manufactured by a company and not hand made by me. i went to fred meyers and looked through their storage section and found a 9x11ish plastic filing box. it was already black inside and seems to be opaque enough. here's what i started with.


this was way more simple than i was originally planning, i'm not complaining just a little shocked i guess. i went through and taped up all the areas that were or seemed like they would leak light. again, very easy and there were not many places that need taping.


i had to cut a hole for the pinhole. the plastic was fairly soft so it was easily done with an exact-o knife. i just measured half way from the top and bottom, and from the left to right.


i'm going to be using 4x5 film in this camera, so i cut a piece of cardboard the same size as a negative holder that fits 4-4x5 pieces of film. then i glued the negative holder on to the cardboard. this way i can just load the film into the holder and tape the cardboard on the inside back of the camera/ box.
after all my years of making pinhole cameras, i never once thought of doing this until i learned about warren harold. i recently feel in love with his work, so i thought i would give his process a try.

so here's the specs for this camera:
focal length: 9 in.
pinhole diameter: .021 in. (i want this camera to be a little blurry, so the p.d and f.l don't really match up)
f/ stop: 431

5.02.2009

holga panorama: round 2

so here is the second set from my in-holga-panorama trails. as you can see i need to do a couple more test to get the clicks and camera adjustments right. on this first one i decided to do 21 clicks for every frame instead of doing less clicks every other frame. i really like this one, but i still want to get it a tighter.


here's the second one. i feel as the vertical panoramas are turning out a lot better, and i enjoy the look of them even more. so i've been a little disappointed with them. the main reason i am doing the horizontal ones is because i am going to write a little how-to for in a couple weeks and need horizontals for the article. so look out for it! anyway here's the horizontal panorama.

4.25.2009

holga in camera panorama.

so i've been working a lot on perfecting the in-camera panorama. it's fun, but no matter what i do the images don't come together as well as i want them too. don't get me wrong, i love the way they are coming out, but i do want the image to be a little tighter. i'm also one of those photographers who is all about the process of doing the work then the actual final piece. i love being out shooting with my hacked up tripod that i got for like a dollar at the local goodwill, and having people seem interested in what i'm doing but not having the time or guts to take to me about it.

anyway, here are the first couple in my panorama/ tiltorama series. i'm trying to figure out how many clicks it takes to get to the next spot i want on the next frame. the most difficult part is where and what to line up in the viewfinder. i've been using objects that are about a seven eighth of the way across the viewfinder (left to right, everything you do with in-camera panoramas need to be left to right), then advancing the film 21 times and lining up the object about an eighth in the view finder (there's got to be an easier way to explain this). i just need to adjust the clicks a little more and i think i may have it.